How to press and preserve flowers for herbarium specimens
In 1839, a teenage Emily Dickinson began pressing wildflowers between sheets of paper. By the time she was done, her herbarium held 424 dried specimens across 66 pages – a collection so well preserved that botanists still study it today at Harvard University. The thing is, Dickinson wasn’t a trained scientist. She was a curious person with a few basic tools and a lot of patience.
That’s the beauty of building a herbarium: it sits right at the intersection of science, art, and personal observation. Whether you’re a biology student documenting local flora, a nature journaler looking to deepen your practice, or someone who simply wants to capture a fleeting wildflower season, the process is surprisingly accessible. But “accessible” doesn’t mean “mindless.” The difference between a specimen that lasts two centuries and one that crumbles within a year comes down to technique – and a handful of details most beginner guides skip over.
Why bother pressing plants in the digital age?
You might wonder why anyone still flattens plants between paper when a smartphone photo takes half a second. Fair question. But a photograph captures appearance. A herbarium specimen preserves the actual organism – its cellular structure, its DNA, even chemical compounds that can be analyzed decades later. Researchers at institutions like the New York Botanical Garden and the Smithsonian regularly extract DNA from specimens collected over a hundred years ago to study how plant populations have shifted with climate change.
For non-scientists, the value is different but no less real. A pressed plant carries texture, scale, and a kind of presence that no image replicates. It forces you to slow down, look carefully at vein patterns, leaf arrangements, and the tiny structures you’d normally walk right past. I’ve found that people who start pressing plants suddenly notice far more on every hike – which species bloom first, which ones share the same patch of soil, how a single plant changes across the growing season.
What to collect – and what to leave alone
Before you pull anything out of the ground, pause. Ethical collecting matters, and in the U.S. it’s also a legal issue. Collecting from national parks is prohibited without a research permit. State parks vary by jurisdiction. Many native species – especially orchids, trilliums, and certain cacti – are protected under state endangered species laws. The safest approach:
- Collect from your own yard, garden, or private land with permission.
- Focus on abundant, widespread species rather than rare ones.
- Never take more than you need – one or two representative specimens is enough.
- Gather invasive species freely; documenting their spread is genuinely useful for science.
- Check your state’s natural heritage program database before collecting wild plants on public land.
Which parts of the plant matter most?
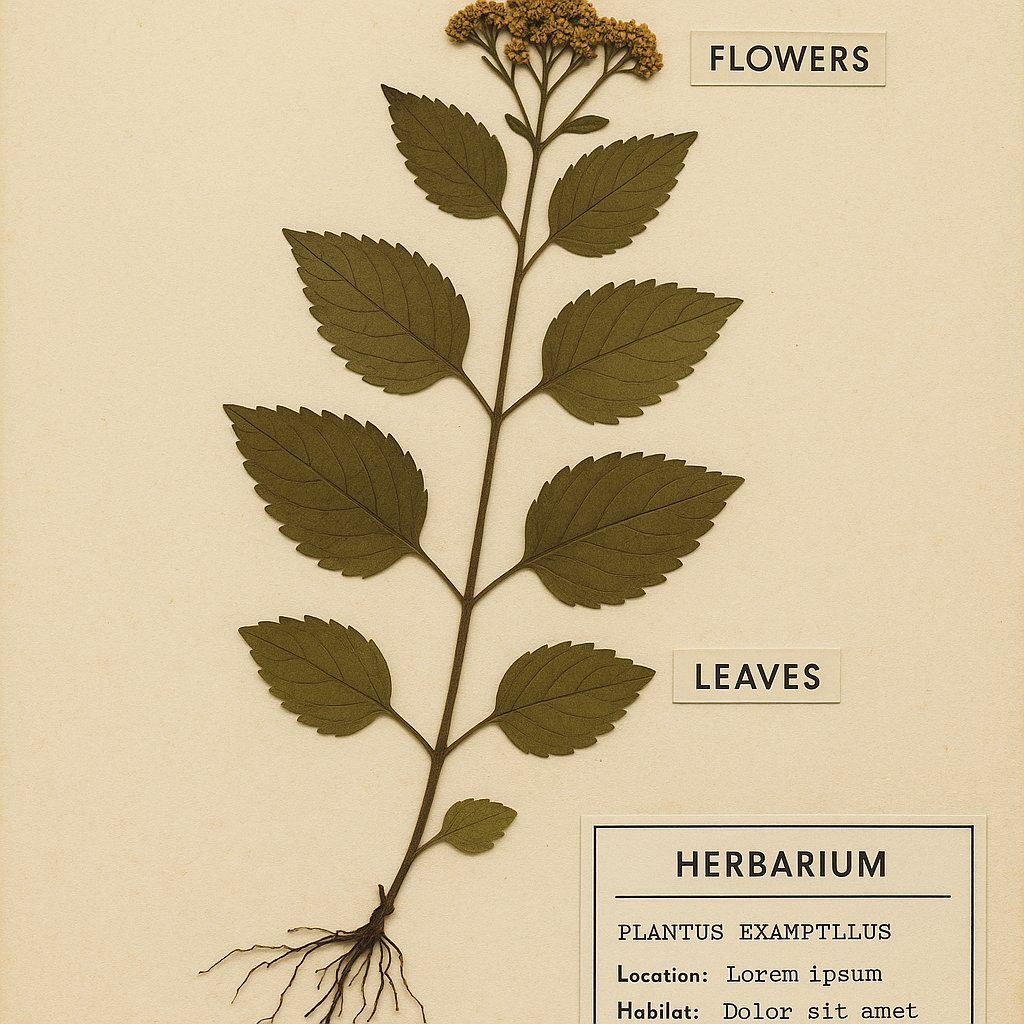
This is a gap I notice in many guides: they tell you to press flowers, but a proper herbarium specimen ideally includes the whole plant or at least multiple structures. Flowers alone make for pretty art, but they’re often insufficient for identification. Here’s what botanists actually want to see on a single sheet:
- Leaves – both surfaces visible (flip one leaf over), showing the base and tip.
- Flowers or fruit – ideally at different stages. If you can catch a bud, an open flower, and a developing seed pod, that’s gold.
- Stems – enough to show branching pattern, whether it’s hairy or smooth, round or square in cross-section.
- Roots – for small herbaceous plants, include the root system when possible. For trees and shrubs, skip this and note the bark texture in your label.
If the plant is too large for a standard 11.5 × 16.5-inch herbarium sheet, bend the stem into a V or N shape, or press representative sections separately and note on your label that they belong to the same individual.
A step-by-step pressing method that actually works
Most tutorials describe the basic book-pressing method. That’s fine for casual flower crafts, but herbarium-quality specimens demand a bit more structure. Here’s the approach used in university herbaria across the country, adapted for home use.
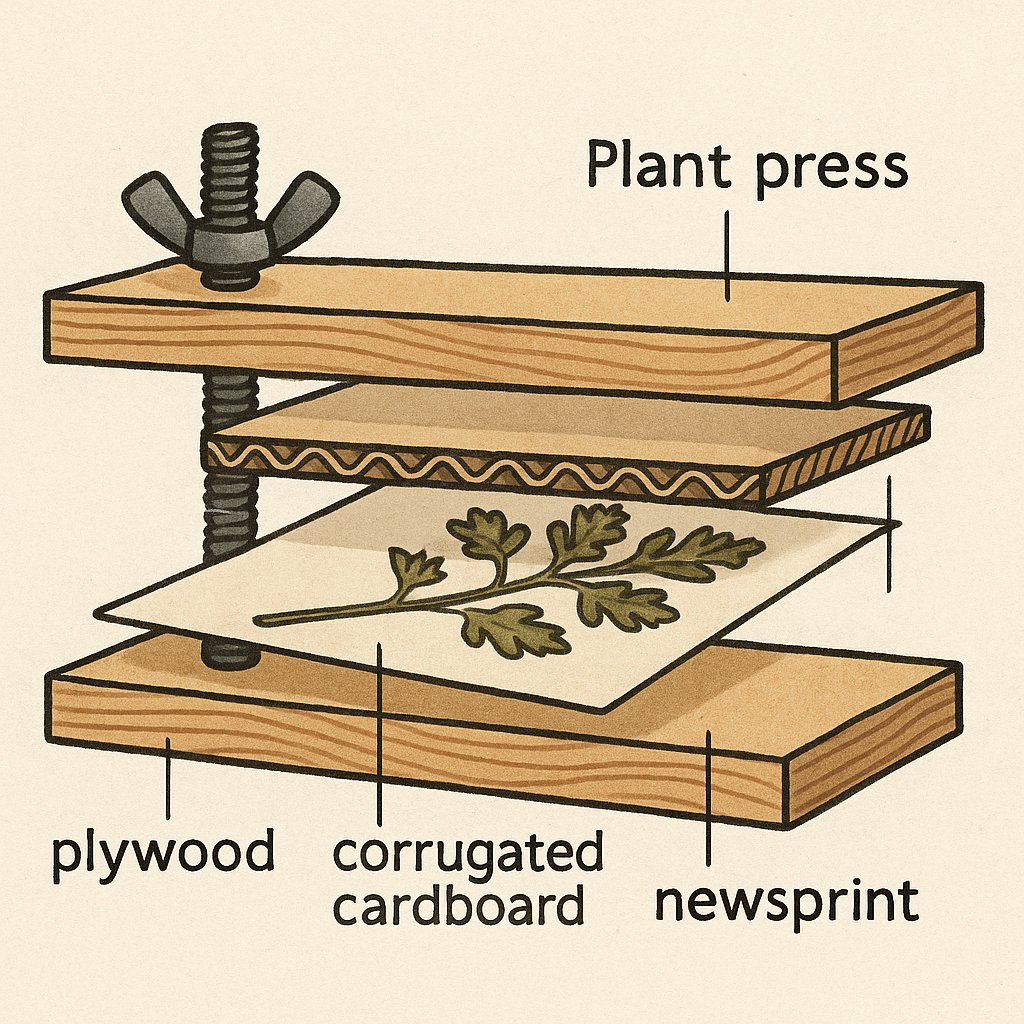
Gear you’ll need
- Two pieces of plywood or stiff cardboard (roughly 12 × 18 inches)
- Corrugated cardboard ventilators (same size, with the flutes running the short way for airflow)
- Absorbent paper – newsprint works well; avoid glossy or coated paper
- Straps, belts, or heavy-duty rubber bands to tighten the press
- A notebook or adhesive labels for field data
The process
- Collect during dry conditions. Wet plants invite mold – the number-one enemy of good specimens. If you must collect after rain, gently blot surfaces with a paper towel before pressing.
- Arrange immediately. Don’t toss plants into a bag and deal with them later. Wilted material is exponentially harder to position well. If you’re in the field, carry a field press or at least a few folded sheets of newspaper inside a rigid folder.
- Layer the sandwich. The stacking order matters: plywood board → corrugated cardboard → newspaper fold with plant inside → corrugated cardboard → newspaper fold with next plant → and so on, ending with cardboard and the second board on top.
- Tighten firmly. More pressure than you think is correct. Loose pressing leads to wrinkled, curled specimens. Cinch those straps down until the press feels solid.
- Change the paper. This is the step most beginners skip, and it’s the one that makes the biggest difference. After 24 hours, swap out the damp newsprint for dry sheets. Repeat daily for the first three to four days. The faster moisture leaves the plant, the better the color retention.
- Wait. Most specimens need two to four weeks of total drying time, depending on plant thickness and ambient humidity. A fully dried specimen feels papery and stiff, not at all flexible. If it bends without cracking, it’s not ready.
The “Polish pressing” alternative
Here’s a technique that rarely appears in American guides but is standard practice among European field botanists. Instead of a bulky wooden press, you use a stack of newspapers interleaved with blotting paper, placed under a board or heavy books, and you iron each newspaper layer with a warm (not hot) clothing iron after the first day. The heat accelerates moisture removal dramatically, often cutting drying time in half. It works especially well for fleshy plants – succulents, thick-petaled flowers – that tend to rot before they dry in a conventional press. Just keep the iron on a low setting, use a thin cloth barrier, and never apply steam.
Mounting, labeling, and long-term storage
A dried specimen without data is just a pretty dead plant. What transforms it into a scientific record – or even a meaningful personal keepsake – is the information you attach to it.
The herbarium label
Professional labels follow a standard format, and adopting it gives your collection real credibility. Include:
- Scientific name (and common name if known)
- Family
- Location – be specific: county, state, GPS coordinates if possible
- Habitat description – “moist roadside ditch in partial shade,” not just “outside”
- Date of collection
- Collector’s name and collection number
- Notes – flower color (it fades!), scent, pollinators observed, associated species
That note about flower color deserves emphasis. Reds often dry to brown or black. Yellows hold up reasonably well. Blues and purples can shift. Write down the original color while you’re still looking at the living plant – future-you will thank past-you.
Mounting the specimen
Standard herbarium sheets are acid-free card stock, roughly 11.5 × 16.5 inches. Archival-quality mounting paper matters because regular cardboard or construction paper will yellow, become brittle, and damage your specimens over time. You can find acid-free sheets at most art supply stores.
For attachment, professional herbaria use a combination of methods:
- Archival glue (PVA-based) applied sparingly to the back of the specimen
- Thin linen tape strips across stems and thick sections
- Small paper packets (called “fragment envelopes”) glued to the sheet to hold loose seeds, petals, or bits that fall off
Avoid clear tape, rubber cement, or hot glue – they degrade, discolor, and can make future scientific study impossible.
Keeping your collection safe for decades
Insect damage is a real threat. Dermestid beetles and booklice love dried plant material. Museums freeze incoming specimens at -20°F for 72 hours to kill any hitchhiking larvae. At home, you can seal finished sheets in zip-lock bags and place them in a chest freezer for three days. Repeat once a year if you live in a humid climate.
Store mounted sheets flat – never rolled or folded – in closed cabinets or archival boxes, away from direct sunlight and moisture. A climate-controlled room is ideal, but a dry closet works for personal collections.

Mistakes that ruin specimens (and how to avoid them)
After years of watching students and hobbyists build their first herbaria, I’ve seen the same errors come up repeatedly. Here’s a quick cheat sheet:
| Common mistake | Why it matters | Fix |
|---|---|---|
| Not changing paper often enough | Trapped moisture causes mold and browning | Swap newsprint daily for the first 3–4 days |
| Pressing only flowers, no leaves | Specimen becomes unidentifiable | Collect the whole plant or multiple organs |
| Skipping the label | An unlabeled specimen has zero scientific value | Write field data immediately – don’t rely on memory |
| Using too little pressure | Wrinkled, curled, uneven drying | Tighten straps firmly; add weight if needed |
| Storing in a damp area | Mold and insect infestation | Use sealed boxes in a dry, cool space; freeze annually |
From pressed plants to something larger
Building a herbarium is one of those rare activities that sharpens your eye, grounds you in a place, and creates something that genuinely grows more valuable over time. Your collection doesn’t need to rival the Smithsonian’s 5 million sheets. Even a modest set of 30 or 40 local species, properly pressed and labeled, becomes a personal botanical archive – a snapshot of what grew where you lived, in the year you paid attention.
If you’re drawn to the idea of documenting the world through careful observation and the right words, you might enjoy exploring other ways to blend learning with creative expression. The team at Learn to Love Your Words shares thoughtful perspectives on how language, curiosity, and personal practice intersect – worth a look if this kind of slow, attentive work resonates with you.
Start small. Press one plant this week. Label it carefully. See what you notice that you never noticed before.